When aiming for premium print quality, it is crucial to store your logo file in a vector EPS format. If your logo is in another format, there’s no need to fret; converting it to EPS is a straightforward process. Stay with us to learn how!
What is EPS format?
Encapsulated PostScript (EPS) is a pioneering vector graphic format developed by Adobe Systems. It’s recognized for its versatility across various platforms and applications. Regardless of the software you use, from Adobe Illustrator to Corel Draw, or the operating system you’re on, be it Windows or iOS, EPS guarantees consistent and high-quality rendering. One of the significant benefits of EPS is its ability to maintain the quality of the graphic even when scaled to different sizes.
Advantages of EPS Format for Logos
- Scalability: EPS files can be resized to any extent without loss of quality, making them ideal for various uses from business cards to billboards.
- Compatibility: EPS is compatible with most graphic design software and is widely accepted by printers and publishers.
- Versatility: It can contain both vector and bitmap graphics, as well as text, making it versatile for complex designs.
- Color Accuracy: EPS supports CMYK color model which is used in color printing, ensuring color accuracy in print materials.
Points to Consider
- When sharing EPS files with others, ensure that any fonts used in the logo are either converted to outlines or are included with the file, to avoid any discrepancies in appearance due to missing fonts.
- Always keep a backup of the original EPS file, so you can make modifications or conversions as needed in the future.
- It’s also good practice to have your logo available in other common formats like PNG or JPEG for ease of use in digital media, where EPS might not be supported.
How to convert PNG and JPEG logos into EPS format?
Raster-based graphics, predominantly utilized online, are beneficial when high resolution isn’t a fundamental requisite. Nevertheless, raster formats lack efficiency for printing purposes. For optimum printing results, graphics need to be transformed from PNG or JPEG to EPS format.
Online Converters
To convert PNG and JPEG images into EPS (Encapsulated PostScript) format using online tools, follow the steps below. Note that this conversion usually works best with simple, high-contrast, and high-resolution images, as converting raster images (PNG, JPEG) to vector formats (EPS) can lead to a loss of quality due to the fundamental differences between these two types of formats.
- Search for online converters: Use search engines like Google to search for “PNG to EPS converter” or “JPEG to EPS converter online”. You will find many websites that offer this service for free.
- Choose an online converter: Select one of the online converter tools from the search results. A few popular ones include:
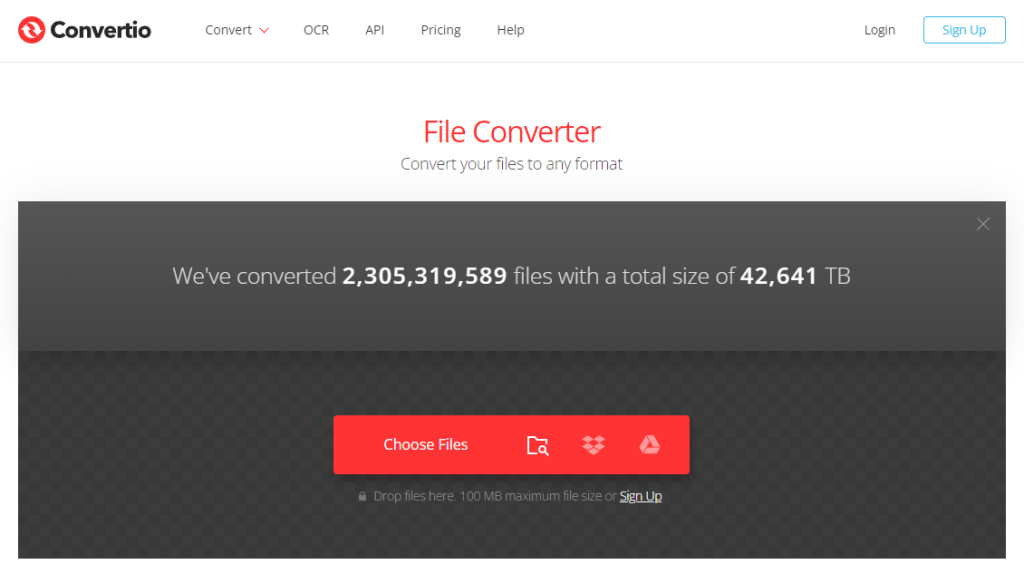
- Convertio
- Cloudconvert
- Freeconvert
- Upload your image: Go to the selected online converter website and upload the PNG or JPEG logo you want to convert. Usually, there is an “Upload” or “Drag & Drop” option to upload your files.
- Select EPS as output format: Once you have uploaded the image, select EPS as the output format.
- Start the conversion: After selecting the output format, look for a button usually labeled “Start conversion”, “Convert”, or something similar and click on it to start the conversion process.
- Download the converted file: Once the conversion is complete, download the converted EPS file to your computer. There should be a “Download” button or a link provided by the converter website.
Additional Notes:
- The conversion from raster to vector can be complex, and automatic online conversion may not always yield perfect results, especially with more intricate or detailed logos. In such cases, you might need to use professional graphics software like Adobe Illustrator for manual tracing and conversion.
- Always review the converted file to make sure it meets your quality standards before using it.
- If you have the option, always use vector formats like EPS, SVG, or AI for logos and other designs where preserving quality at different scales is important.
- Keep in mind the privacy concerns while using online tools, especially with sensitive or proprietary images. Some online services may retain uploaded images, so always read the privacy policy of the tool you are using.
Graphic Design Software
To convert PNG and JPEG logos into EPS (Encapsulated PostScript) format, you can use graphic design software such as Adobe Illustrator or CorelDraw. Here are step-by-step guides for both programs:
Adobe Illustrator
Adobe Illustrator is a widely used vector graphic design application suitable for converting raster images like PNG and JPEG to vector formats like EPS.
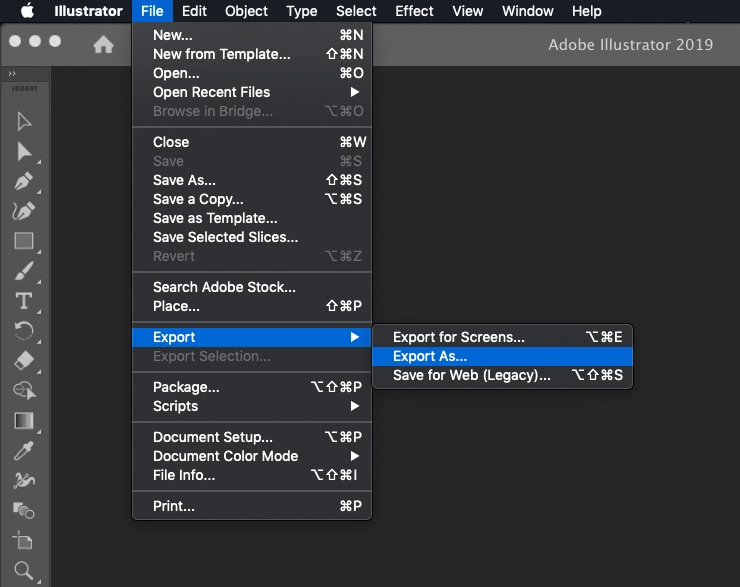
- Open Adobe Illustrator.
- Open the PNG or JPEG File: Go to File > Open, and then select the PNG or JPEG file you want to convert.
- Image Trace: Once the image is open, select it. Open the Image Trace panel by going to Window > Image Trace. You can play around with the presets and settings to get the best trace results.
- Expand the Image: Once you’re satisfied with the trace, click on the Expand button at the top of the screen.
- Save as EPS: Go to File > Save As. Choose a location to save your file, and from the Format drop-down menu, select Illustrator EPS (*.EPS). Click Save, and in the EPS Options dialog box, you can keep the default settings or modify as needed. Finally, click OK.
CorelDRAW
CorelDraw is another popular software for vector graphics designing.
- Open CorelDRAW.
- Import the PNG or JPEG File: Go to File > Import, and then choose the PNG or JPEG file you wish to convert.
- PowerTRACE: Once the image is imported, select it. Go to Bitmaps > Outline Trace and select a tracing preset that suits your image (such as Detailed Logo). Adjust Settings: Play around with the settings in the PowerTRACE window to achieve the desired result. Once satisfied, click OK to finalize the trace.
- Export as EPS: Go to File > Export. In the Export dialog box, choose EPS from the ‘Save as type’ drop-down list. Choose a location, give a name to your file, and click Export. Adjust settings if needed in the next dialog box and click OK.
Additional Notes:
- EPS is a vector format, and PNG and JPEG are raster formats. When converting from raster to vector, the software tries to trace the outlines of the shapes in the image. The quality of the output heavily depends on the resolution and quality of the input raster image.
- For logos with complex designs or gradients, manual adjustments may be required after the trace to achieve an accurate and high-quality vector representation.
- Ensure that there are no copyright or legal restrictions before converting logos that you do not own or have permission to modify.
How to convert SVG and PDF logos into EPS format?
To convert SVG and PDF logos to EPS format using online tools, follow the steps below. Please note that it’s important to ensure that you have the right to modify, convert, or use the logos, especially if they are copyrighted material.
Online Converters
- Go to an Online Conversion Tool: For example, Convertio, which supports a variety of format conversions, including SVG and PDF to EPS.
- Upload your SVG File: Find the ‘Select Files’ button, usually present on the homepage, and upload your SVG logo file.
- Choose Output Format: Look for an option to select the output format and choose ‘EPS’.
- Start Conversion: After selecting the output format, click ‘Start Conversion’ or equivalent. Once the conversion is complete, download the resulting EPS file.
Additional Notes:
- Quality: Check the quality of the converted logo to ensure that there is no loss in detail or clarity, especially when dealing with intricate designs.
- Confidentiality: Be mindful of uploading sensitive or confidential files to online conversion sites as there can be risks associated with data privacy and security. Some sites offer guarantees or policies regarding the deletion of uploaded files after conversion – review these before using the service.
- Software Option: If you prefer a more secure option and have access to design software like Adobe Illustrator, you can convert logos to EPS format locally on your computer without using online tools. This approach might be better suited for handling high-quality and confidential logos.
- Attribution and Copyrights: When converting and using logos, especially if they are not your own creation, be sure to respect intellectual property rights and give proper attribution when necessary. Unauthorized use of copyrighted material can have serious legal repercussions.
Graphic Design Software
Here’s a step-by-step guide on how to convert SVG and PDF logos into EPS format using Adobe Illustrator and CorelDraw:
Adobe Illustrator
- Open Adobe Illustrator.
- Open the SVG or PDF File: Go to File > Open and select the SVG or PDF file you want to convert.
- Review the Artwork: Once the file is open, review the artwork and make any necessary adjustments to the vector paths, colors, or strokes.
- Save as EPS: Go to File > Save As. Choose a location to save your file, and from the Format drop-down menu, select Illustrator EPS (*.EPS). Click Save. In the EPS Options dialog box, you can keep the default settings or modify as needed, then click OK.
CorelDraw
- Open CorelDRAW.
- Import the SVG or PDF File: Go to File > Import and select the SVG or PDF file you want to convert. Place the imported graphic on the page.
- Review the Artwork: Review the artwork, adjust the size, colors, or strokes as needed.
- Export as EPS: Go to File > Export. Choose a location to save your file. From the ‘Save as type’ drop-down list, select EPS – Encapsulated PostScript. Click Export. In the next dialog box, adjust settings as needed and click OK.
Additional Notes:
- When converting from SVG or PDF to EPS, make sure to review the file to ensure that all vector paths, colors, and details are retained after conversion, as there may be differences in how each format handles these elements.
- Always ensure you have the legal right to convert and modify logos, particularly if they are copyrighted or trademarked.
Final Thoughts
Concluding this concise guide, here’s a prudent piece of advice. If the intention is to print your EPS image on materials like fabric or plastic, abstain from using visual effects like shadows, gradients, and opacity to avoid conversion and printing complications.