An easy, step-by-step guide from a web developer on how to build a website for free in 2024.
Here’s why you’ll love this FREE website setup guide:
- We made it for BEGINNERS(!)
- The guide is very detailed yet easy to follow – even if you’re not very technical.
- It’s ‘Up-to-Date’
- Other guides can be outdated or misleading. I update my guides every month.
- Platform Specific (WordPress)
- Your website will be set up correctly on the right platform for what you need.
- You can ask for help!
We offer free help and consultation via email. We are delighted to provide you with answers and address any inquiries you may have.
3 Simple Steps to Make Your Own Website:
You’ll learn how to…
1. Choose a website building platform
2. Choose a domain name (www.) and host
3. Setup, design and tweak your website
STEP #1: Choose Your Website Platform
Prior to delving into considerations such as color schemes and domain names, it’s crucial to determine the platform upon which you’ll construct your website.
What I we mean by “platform”?
Back in 2004 when I began my journey in web development, the primary tools for building websites were HTML (markup language), CSS (stylesheet language), and even Flash. Learning these languages was time-consuming and mastering them presented significant challenges.
That’s precisely why many individuals still perceive creating a website from scratch as challenging or believe it demands extensive coding and design expertise. However, that’s no longer the case!
In 2024, content management systems (CMS) like WordPress have made creating a website accessible to everyone.
To put simply, a content management system (or website building platform) is a user-friendly platform for building websites and managing your own online content, instead of using a bunch of loose HTML pages.
Now, I’m going to walk you through the simplest and most popular platform options. If you’re already chosen your platform, skip down to step two.
Platform #1: WordPress
I’d recommend you use the WordPress platform.
I primarily recommend WordPress for most websites due to it’s ease of use. If you’ve used Microsoft Word, you can use WordPress. (Note: This is WordPress.org, not WordPress.com, which offers free sites).
WordPress is completely free, rendering it an exceptionally cost-effective platform. Moreover, it boasts responsiveness, ensuring optimal performance on tablets and mobile devices, a critical feature in today’s digital landscape. If a website fails to function properly on mobile, it significantly diminishes its appeal to visitors. Have you ever encountered one of those poorly optimized sites?
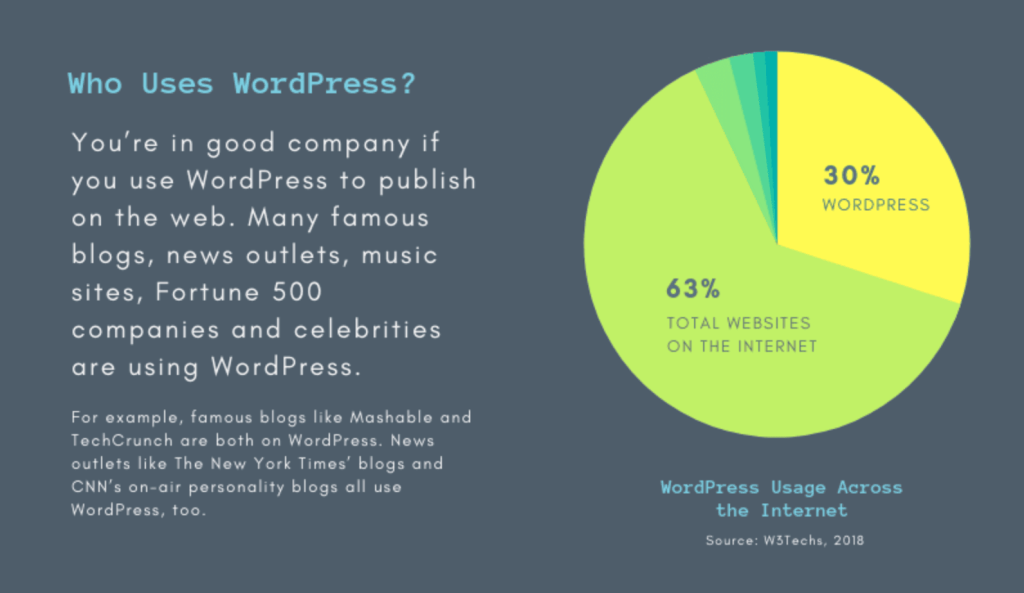
WordPress is the most robust, most popular platform, powering about 25% of all websites. If you’re primarily looking for a blogging platform, it’s hard to beat WordPress.
Due to its widespread adoption, WordPress boasts a vast support community. This means that if you encounter any questions or issues, you’ll have no trouble finding answers and assistance.
Creating pages and blog posts in WordPress is really easy, and there is a massive library of around 40,000 open-source plugins which you can use to accomplish just about anything on your site.
Plus, WordPress also has thousands of free templates, allowing you to endlessly customize the look and feel of your website.
When it comes to ease of use, the abundance of resources, and overall flexibility, it’s incredibly challenging to surpass WordPress.
It’s almost a no-brainer, although some people would prefer other platforms.
One caveat: You do need to be careful with installing random plugins since many of them haven’t been sufficiently tested. Installing a buggy plugin can jack up your site.
If you’re choosing WordPress as your platform (and you probably should), skip ahead to step two now.
Platform #2: Joomla
Joomla is a bit more difficult to use than WordPress, but is still relatively simple. Like WordPress, you can create blog posts, edit pages, and customize website settings.
And like WordPress, Joomla also has a large database of free plugins, which you can use to customize your site. It’s important to remember that while plugins offer enhanced functionality, they aren’t always rigorously tested, potentially introducing security vulnerabilities to your site.
Platform #3: Drupal
Drupal is notably more intricate compared to WordPress or Joomla, and consequently, it presents the steepest learning curve. However, it does offer the most customization options.
Rather than plugins, Drupal offers modules, and Drupal indicates which of these modules is being actively developed, which in turn helps you avoid the security risks.
Unless you really know your web development, I’d recommend sticking with WordPress for creating your website. It’s powerful enough to accomplish just about anything, without the difficulty of Drupal or Joomla. If you’re committed to creating a sophisticated web tool or application, it may be wise to consider hiring an experienced developer or reputable development firm.
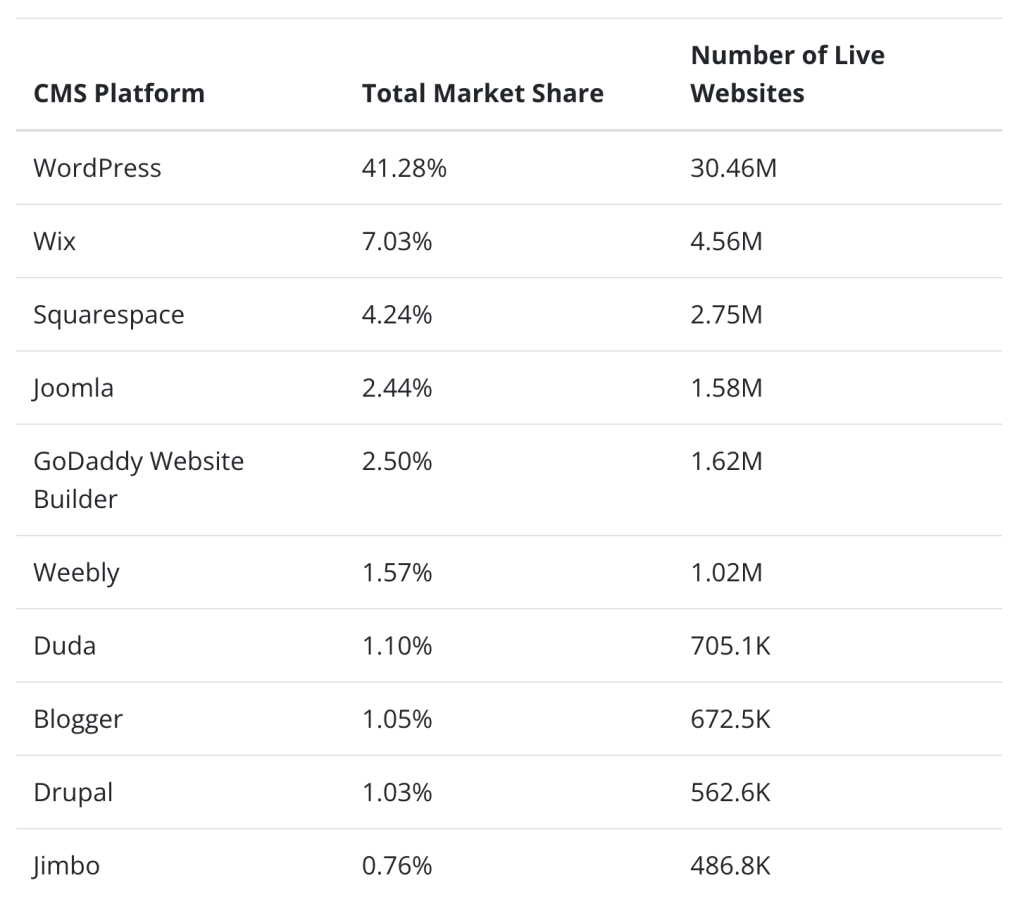
As illustrated in the graph above, nearly half of the websites on the Internet are powered by the WordPress website platform.
Why WordPress and not website builders?
Given the current landscape, there are simply no superior or simpler methods for constructing a website. However, more importantly:
#1. It’s completely free, offering a plethora of layouts and themes to select from.
WordPress comes at no cost for downloading or installation, and benefits from a vast community that has crafted stunning themes and templates, facilitating a swift start-up process. You’ll never run out of uniqueness…
#2. It’s VERY beginner-friendly.
If you know how to use Microsoft Word, you already know how add your own content. WordPress can be expanded with free plugins to handle just about any site you can imagine – from gorgeous business pages to social networking sites. With “plugins” you’ll be able to add contact forms, subscription forms, image galleries and so on for your website – pretty simple, huh?
#3. Small or large site? Great for both.
WordPress is versatile enough to accommodate a wide range of websites, from simple blogs to elegant business sites and online stores. WordPress is used by eBay, Mozilla, Reuters, CNN, Google Ventures and even NASA.
#4. Your site will be ‘responsive’. Meaning it’ll work on mobiles & tablets, too.
The website you create will automatically be responsive, ensuring it looks fantastic on all mobile devices, including smartphones and tablets. There’s no requirement to hire a web developer for this functionality.
#5. HUGE support and a developer community available to help.
With so many people using the platform (Webmasters, Bloggers, Theme developers and Plugin creators), it’s easy to find QUICK help when you need it. In addition, WordPress has lots of free resources both available on Youtube and their support forum.
In fact, I built logomak.com on WordPress, too.
Of course, there are other website building / CMS platforms, too.
But, I would still use WordPress.
Drupal is a very powerful platform that is popular with web developers and experienced coders, but it comes with a very steep learning curve that makes it a bad choice for beginners.
Joomla is similar to WordPress and works great for websites too, but you’ll need at least a little bit of technical coding to make it work the way you want.
If you want more details, I’ve put together a pretty comprehensive comparison between WordPress, Joomla and Drupal.
If for some reason you don’t want to build your site with WordPress, check out my Drupal, Joomla and HTML5 guides as well. They are all FREE to use.
For beginners, I suggest sticking to WordPress.
WordPress is the most user-friendly platform I’ve ever encountered, yet it’s adaptable enough to cater to everyone, from small business owners and freelancers to creative artists and bloggers.
I would look no further than WordPress.
In Step 2, I’ll guide you through selecting a domain name and securing hosting space for your site.
In Step 3, I’ll show you how to install and customize your WordPress website. Don’t fret—I’ll lead you through the process with plenty of visual references to assist you.
If you have any questions/suggestions for this guide don’t hesitate to contact me. Remember: I’m here to help!
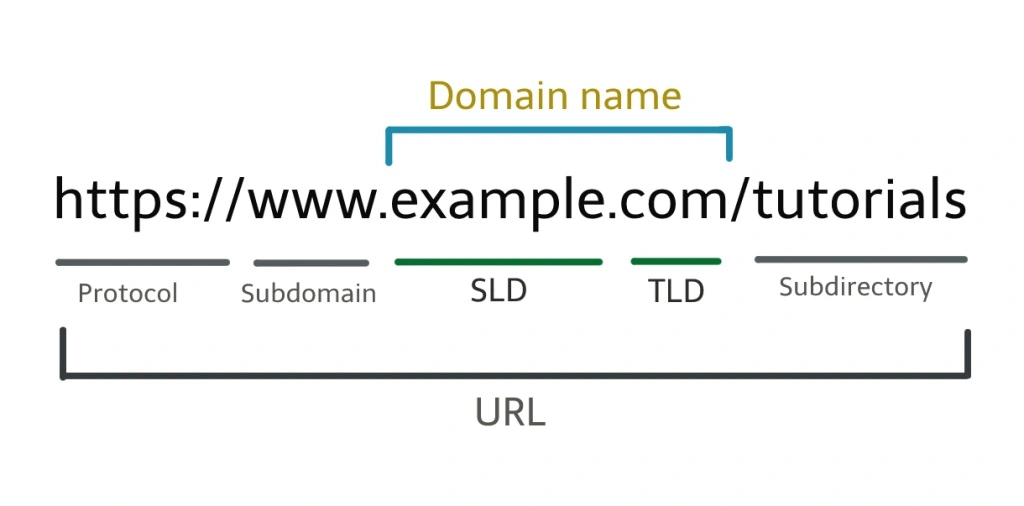
STEP #2: Finding a Domain Name and Hosting
To launch a new website, you’ll need two essential components:
- A domain name (a web address like yoursitename.com)
- Hosting is a service that links your site to the internet.
While the WordPress platform itself is free, expect to pay around $3 to $5 per month for a domain name and hosting. However it costs less than a coffee, so it won’t break the bank.
Having your own domain name lends a much more professional appearance compared to hosting your site on someone else’s domain (such as yourbusiness.my-free-website.com). Additionally, it’s remarkably affordable.
Plus, having your own hosting will also make sure your website loads quickly and won’t go down for hours at a time (pretty important for everyone who visits your pages.)
Where can I obtain a domain name and hosting?
I’ve mostly used www.Bluehost.com as a web hosting and domain registrar for myself and for my web development projects.
Their basic website hosting costs less than a movie ticket ($2.75/mo) and they throw in a FREE domain name (a nice perk to have).
Of course you can try other web hosting providers and even try to host your site by yourself, but it’s a very complicated process and often wouldn’t be capable of serving your website visitors. So save yourself some money and get a proper host that meets WordPress requirements.
When you get a domain name (and hosting), you’ll also get a personal email account(s): You@YourSite.com – way more professional than a generic Gmail or Yahoo address.
Already have a domain name and hosting? Go ahead and skip to step 3, where I’ll explain how you can set up your website.
What kind of domain name should I pick?
As an easy starting point:
If you’re creating a website for your business, your domain name should align with your company name. For instance, YourCompanyName.com would be ideal.
For personal websites, opting for YourName.com can be an excellent choice.
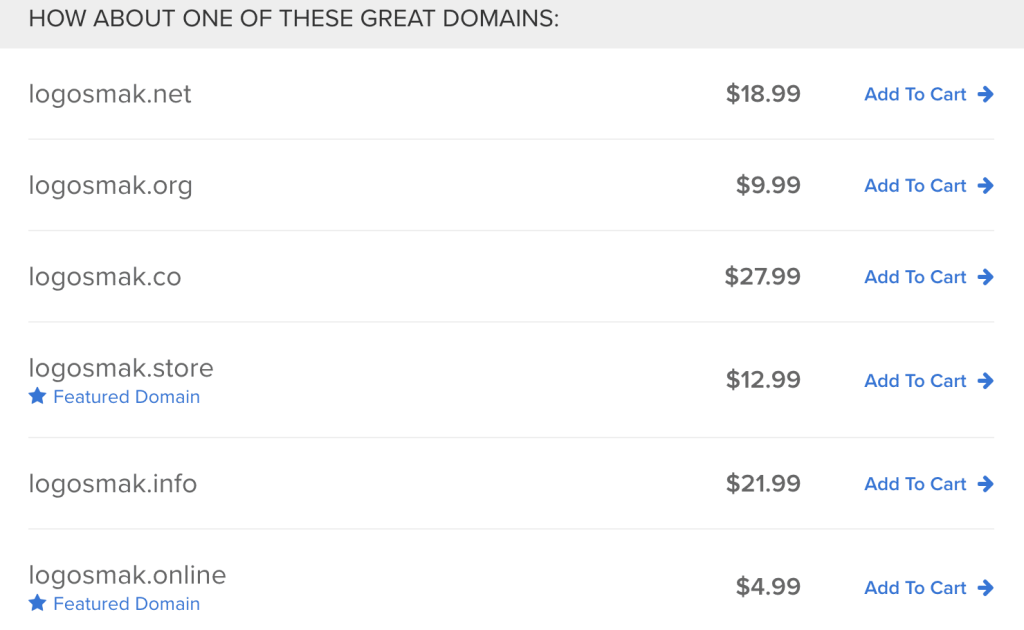
Traditionally, domain names end with .com, .org, or .net. However, in recent months, there has been an influx of various domain extensions, ranging from .agency to .pizza.
My top recommendation? Stick with the familiar extensions like .com, .net, or .org, unless a more specific extension perfectly encapsulates what you offer. Even then, consider whether a more common extension might be preferable.
While .com, .org, and .net are widely recognized and easily recalled, the trend of using alternative domain extensions hasn’t fully caught on yet. As a result, people may have difficulty finding your site if you opt for an unconventional extension.
Any additional tips for choosing my domain name?
There are a few things that can help you choose your domain name:
#1 Does it have brand appeal? For instance, if your website focuses on poetry, a domain like best-poetry-website.net wouldn’t be ideal; poetryacademy.com or poetryfall.com would be more effective.
#2 Is it memorable? Short, concise, and straightforward domain names are far easier to recall. If your domain name is overly complex, lengthy, or spelled unusually, visitors might struggle to remember it.
#3 Is it catchy? You want a domain name that rolls off the tongue, describes what you (or your business) does and sticks in the head. Finding a catchy name can be challenging given the approximately 150 million active domain names worldwide right now. However, don’t lose hope.
There’s one rule that always applies to domain names: If you like it, go for it.
THINGS TO DO BEFORE THE NEXT STEP:
- Engage in some brainstorming sessions to generate a distinctive domain name that mirrors the essence of your upcoming website, business, or blog.
- Secure your domain name and web hosting. For this I recommend Bluehost.com, but you can pick any other web host as long as it’s reliable and simple.
When picking a hosting company, there are a few things to pay attention to:
Uptime and Reliability
This isn’t as big a deal as it used to be, but it’s still important to pay attention to. The hosting company should offer almost 100% uptime, meaning that your website will be accessible all the time.
After all, what’s the point of creating a website if no one can access it?
Pick hosting providers with nearly 100% uptime guarantees
As your website grows in popularity, this will become more and more important. Heavier traffic places a greater strain on the servers. If your webhost company doesn’t have almost 100% uptime, your website could crash.
Customer Service
If you have problems with your website, and you inevitably will, you’re going to want an outstanding customer support team.
Otherwise, you’ll find yourself frustrated and banging your head against the wall while waiting for them to attempt to rectify the situation. Or you’ll end up on hold for 18 straight hours, all the while being told by a robotic voice that, “Your call is important to us”.
When picking a hosting package, look for details about the customer support team. You want to know that the support team will always be available.
If the customer support team isn’t always available, you could be in significant trouble if your site crashes. And depending on the purpose of your site, a crash could mean lost revenue. You want support that is available and easy to work with.
Planning your website
When planning your website, you will need to make a number of important decisions:
Determining the type of website you need is crucial. Whether it’s a news or informational site, a company or service site, a non-profit or cause-driven site, or an eCommerce shop, each type has distinct focuses that shape its design.
Navigation design is also pivotal. How users navigate your site influences its information architecture and overall usability. It’s essential to plan out the pages, create a sitemap, and develop a navigational structure accordingly.
Content is paramount in online success, as the saying goes, “content is king.” Quality content, including text, images, videos, and more, significantly impacts your site’s effectiveness. Before delving into designing or building pages, a clear content strategy should be established.
STEP #3: Let’s Set Up and Refine Your Website
Once you’ve bought your domain name and set up your hosting, you’re well on your way!
Now it’s time to get your website up and running. The first thing you’ll need to do is install WordPress to your domain.
Installing WordPress
There are two possible ways to install WordPress, one MUCH easier than the other.
1. To create a website with WordPress (or Joomla & Drupal), use one click installation:
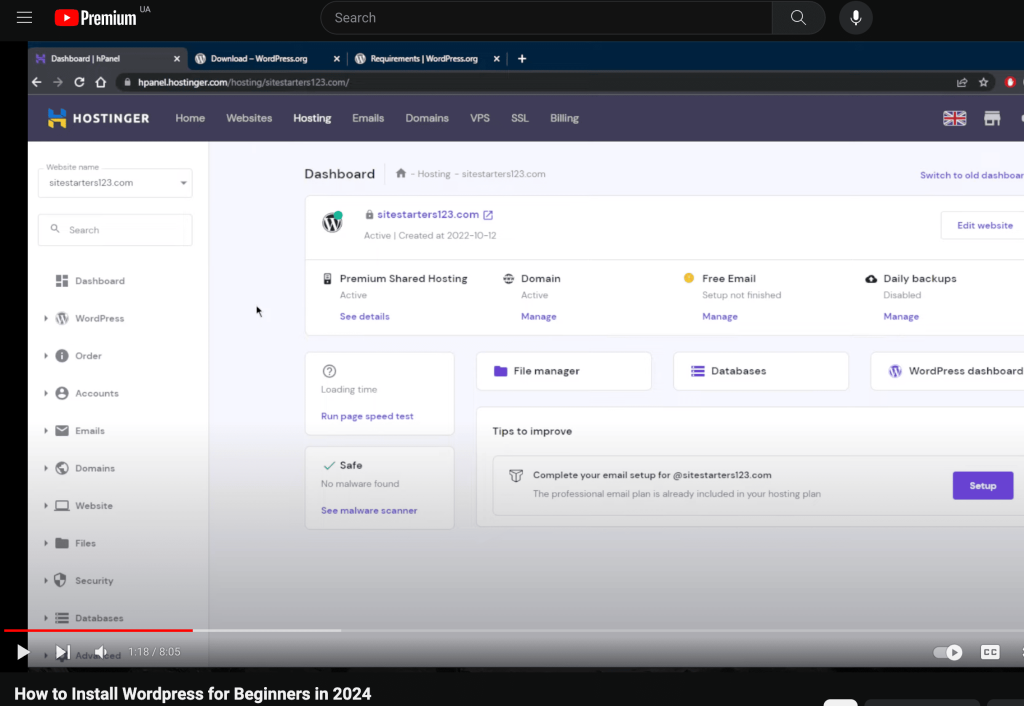
Virtually every reputable and established hosting company offers a seamless 1-click installation for WordPress, simplifying the setup process.
If you’ve registered with Bluehost or a similar hosting provider, you can locate the “1-click-installation” feature in your account control panel.
Here are the steps you should follow (should be similar/same on all the major web hosting companies):
- Log in to your hosting account.
- Go to your control panel.
- Look for the “WordPress” or “Website” icon.
- Select the domain where you wish to install your website.
- Click the “Install Now” button to gain access to your new WordPress website.
- That’s how simple it is to create a website using the one-click installation method.
If you’re unable to locate it, look video:
2. … Or manual install (if needed)
If for some odd reason (some hosting companies don’t provide one-click-install for WordPress) you don’t have the option to install WordPress automatically, look this manual guide below:
Pssst – if they don’t have 1-click-installation, maybe you’re dealing with a bad host!
Choosing a Theme/Template for your site
Once you have successfully installed WordPress to your domain, you’ll see a very basic yet clean site:
However, you don’t want your website to blend in with the crowd, do you? That’s where a theme comes in—a design template that instructs WordPress on how your website should appear. Take a look at a sample version below:
WordPress offers a plethora of themes
Here’s the exciting part: There are thousands of fantastic, professionally designed themes available for you to choose from and customize, allowing you to create a website that’s uniquely yours.
Here’s how to find a theme you like:
1. Log into your WordPress dashboard
If you’re not sure how, type in: http://yoursite.com/wp-admin (replace “yoursite” with your domain).
This is what the WordPress dashboard looks like:
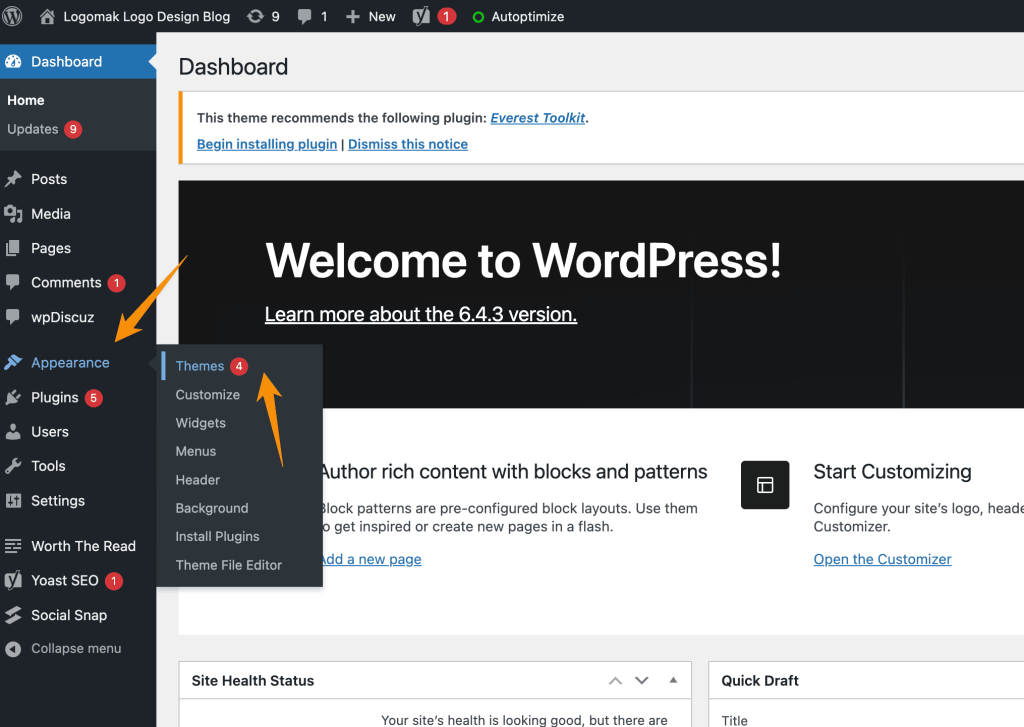
Everything is easily labelled. If you’re feeling a bit overwhelmed, don’t sweat it – I’m going to show you where to go next.
2. Access FREE themes
Once you’re in the dashboard, you’ve got access to over 1500 free themes! Just look along the side bar for “Appearance”, then click “Themes”.
I’ve even curated a list of the 15 most popular free WordPress themes.
However, before you proceed, I highly recommend taking some time to explore the free themes. Many of them are incredibly professional and well-crafted, so don’t dismiss them outright.
As you can see above, installing a new theme for your website is very easy.
You can search for specific keywords and/or use filters to find themes that suit your style. Finding the perfect theme can take a while, but it’s worth it.
You should also look for themes that are “responsive”, as this means they will look good on any mobile device.
Just enter it as one of your keywords, and you’re good to go!
- Installing your new theme
After you’ve found a theme you like, installing it is as straightforward as clicking “Install” followed by “Activate.”
IMPORTANT: Switching themes won’t erase your previous posts, pages, and content. You can change themes as frequently as you’d like without concern about losing your creations.
How do I add content and create new pages?
With your theme installed, you’re prepared to begin creating content. Let’s quickly cover some of the basics:
Adding and editing pages
Want a “Services” page, or an “About Me” page (like I have on my menu at the top of the site)?
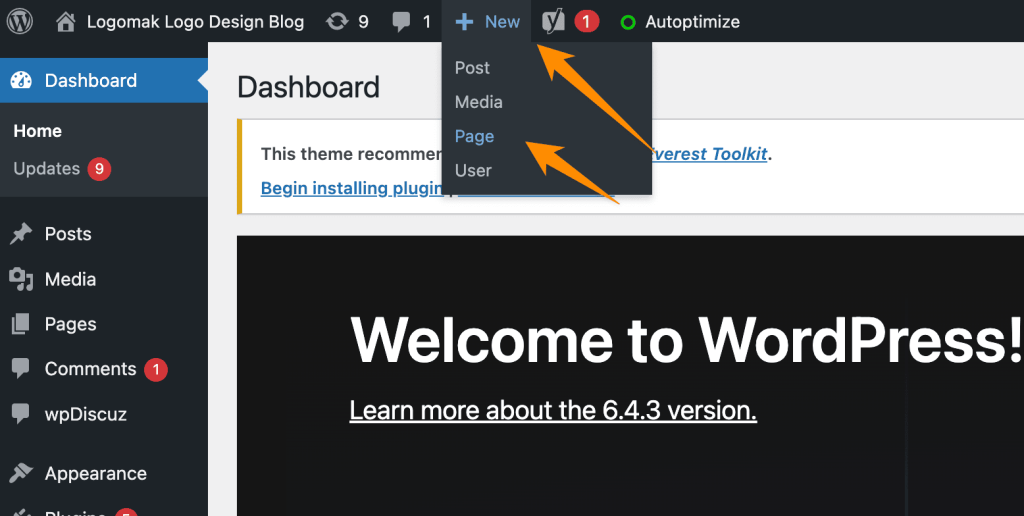
1. Look along the sidebar in the WordPress Dashboard for “Pages” -> “Add New”.
2. Once you’ve clicked, you’ll find a screen that looks a lot like what you’ve maybe seen in Microsoft Word. Add text, images and more to build the page you want, then save it when you’re done.
Tip: since you’ll be working screen by screen here, a dedicated capture tool makes it easy to save and annotate each step as you go. If you’re on a Mac, see our guide to the best screenshot app for Mac.
Adding pages to the menu
If you want your new page to be linked to in your navigation bar,
1. Save any changes you’ve made to the page by clicking “Update”
2. Click “Appearance” -> “Menus” in the sidebar of the WordPress Dashboard
3. Find the page you created and add it to the list by clicking the checkbox next to it and then “Add to Menu”.
Adding and editing posts
If you have a blog on your website, you’ll likely want to navigate to the “Posts” section next. Here, you can use different categories to organize similar posts.
To add a blog to your website, you can utilize various categories and posts. For instance, if you wish to establish a category named “Blog,” you can simply add it to your menu and begin creating posts within that category.
Here’s what you need to do:
a. Create a new category by going to “Posts -> Categories”
OR
b. Create a blog post by going to “Posts -> Add New”. Once you’ve finished writing your blog post, you need to add the right category for it.
Once you’ve created your category, simply add it to the menu, and you’re good to go!
Customization & Endless Tweaks
In this section, I’ll cover some of the basic tweaks that are frequently asked about, helping you fine-tune your website.
Changing Your Title and Tagline
Page titles convey to visitors what your website is about and are also crucial for search engine rankings. Therefore, it’s essential to ensure they include relevant keywords (in a natural manner, written for real people).
Each page on your site should have a unique title. For example, the title of my site is “How to Make a Website.”
(Not sure where to find it? Simply hover your mouse over the tab at the top of your web browser).
Taglines are additional phrases added to the end of titles across every page.
In order to change the title and tagline on your website, go to “Settings -> General” and fill in the form below:
Disabling Comments for Posts & Pages
Some websites (business/organisation sites mostly) don’t want their visitors to be able to comment on their pages.
To disable comments on WordPress pages, follow these steps:
1. While creating a new page, click on “Screen Options” located in the top right corner.
2. Check the box next to “Discussion.” This will reveal the “Allow Comments” option at the bottom.
3. Untick “Allow Comments”.
Want to disable comments on every new page by default?
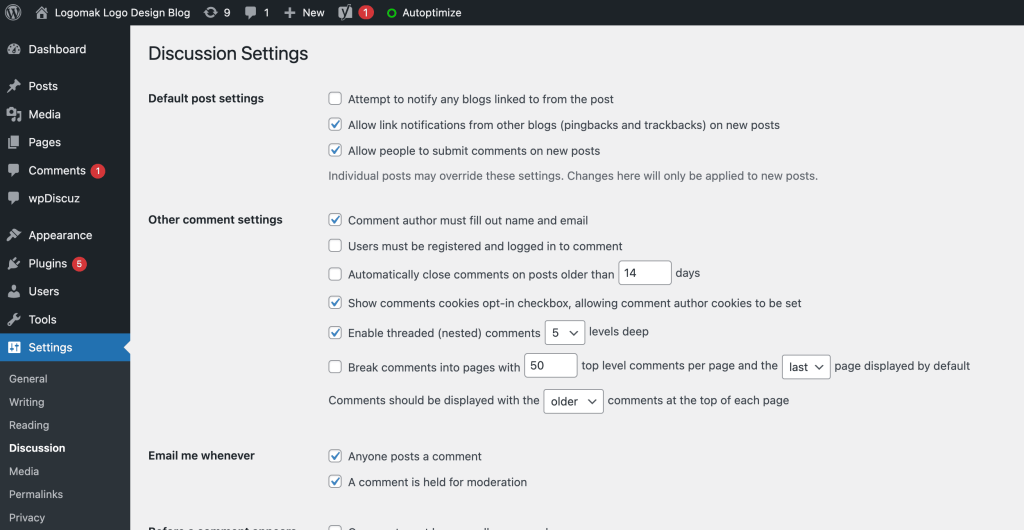
1. Go to “Settings -> Discussion” and untick “Allow people to post comments on new articles”
Setting Up a Static Front Page
Some individuals may express frustration if their home page resembles a blog post. You can address this by configuring your home page to be “static.”
A static page is a page that doesn’t change. Unlike a blog, where the first new article will show up at the top every time, a “static” page will show the same content every time someone comes to the site – like a home page you’ve designed.
To set up a static front page:
1. Go to “Settings -> Reading”
2. Choose a static page that you have created. “Front Page” denotes your home page, “Posts page” is the front page of your blog (if your entire site isn’t a blog).
If you don’t choose a static page on your own, WordPress will take your latest posts and start showing them on your homepage.
Editing sidebar
Most WordPress themes have a sidebar on the right side (in some cases it’s on the left).
If you want to get rid of the sidebar or edit out items you do not need like “Categories”, “Meta” and “Archives”, which are usually pointless, here’s how:
1. Go to “Appearance -> Widgets” in the WordPress Dashboard.
2. Here, you can utilize drag-and-drop functionality to add various “boxes” to your sidebar or remove unwanted items.
Additionally, there’s an “HTML box” available, allowing you to input HTML code. For beginners, don’t fret about this aspect—simply drag and drop the elements you desire into your sidebar.
Installing Plugins to Get More out of WordPress
What is a WordPress plugin?
“Plugins” are extensions that are built to expand WordPress’ capabilities, adding features and functions to your site that don’t come built-in.
They’re shortcuts to getting your site to do what you want to, without having to build the feature from scratch.
You can use plugins to do everything from adding photo galleries and submission forms to optimizing your website and creating an online store.
How do I install a new Plugin?
To start installing plugins, go to “Plugins -> Add New” and simply start searching.
Bear in mind that there are over 25,000 different FREE plugins available, giving you a wide array of options to choose from!
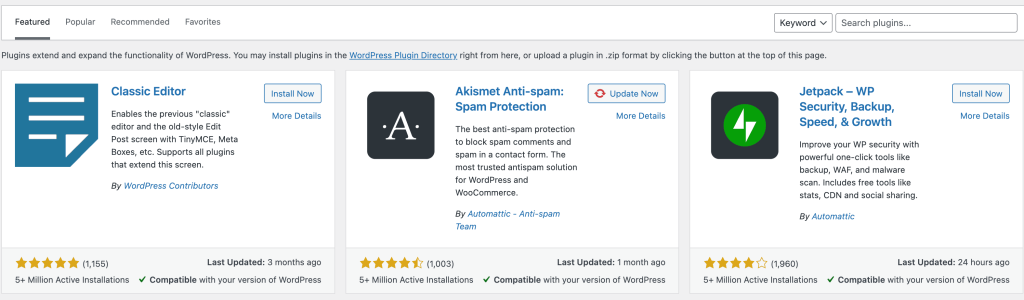
Installation is easy – once you find a plugin you like, just click “Install”.
BUT – before you go and install every single one, I suggest you read this article: Things you need to know about using WP plugins.
To save you some time, I’ve put together a list of the most popular plugins that webmasters find useful:
#1 Contact form 7: My website has a contact form on my About Me page. It’s an awesome feature to have, as people (like you!) can fill in the form and send me an email without logging into their own email provider. If you’re aiming for similar functionality, this plugin is definitely worth considering.
#2 Yoast SEO for WordPress: If you want to make your WordPress site even more SEO-friendly, this plugin is a must-have. It’s free, and it’s awesome. You’ll be able to edit your title tags, meta descriptions and more, all from within the page itself – no more fussing with WordPress settings.
#3 Google Analytics: If you’re keen on tracking your visitors’ traffic and behavior, simply install the plugin, link it to your Google account, and you’re all set.
Of course, this is merely scratching the surface!
Congratulations – you’re ready to launch!
Post-launch…
Preparing for Search Engines (SEO) Ensuring your site ranks prominently in search results is one of the most effective methods for increasing traffic. That’s why it’s crucial to integrate Search Engine Optimization (SEO) from the outset of creating your site.

Within online marketing, SEO is considered a specialized discipline, and its key components include:
- Keyword research: By placing yourself in the mindset of your potential site visitor or client, you can identify the terms they’re likely to search on Google to find your website. These keywords will inform your SEO strategy, so it’s crucial to make informed decisions about which keywords to target.
- Text optimization: Every area of your website that contains text, such as your bio section, blog posts, footer, and FAQ section, should be crafted with SEO in mind. The real trick is to find a subtle and elegant way to integrate your keywords into your site’s textual content without compromising your content’s quality. Search engine crawlers are smart and if they think you sound too much like an ad, they will down-rank you.
- Meta tags: Meta data is not plainly visible to your site visitors. Search engines, however, do read your meta data, and you can control what it is that they see and how they present your site in search results. Follow this guide to understand how to use meta tags to your advantage.
- Alt Text: Search engines can’t read images (yet!) but that doesn’t mean that images are useless for SEO. Every image that you upload to your website should have an ‘Alt Text’ added to it. This very short line explains to search engines what the image depicts, which in turn allows your images to be ‘found’ in search results.
- Link Building: In essence, your search results ranking is enhanced when other websites link to your site. You can initiate this process by submitting your website to directories, ensuring that all your social media profiles link to your site, and encouraging site visitors to share your content.
It’s important to understand that SEO is a continuous, long-term endeavor that doesn’t conclude once your website is launched. You’ll need to continually refine your SEO strategies to achieve sustainable results over time.
Get A Kick-Ass Logo Designed
Now that you’ve got a beautiful website, you’re going to want a killer logo. A logo gives your site a professional, coherent look, and adds to the overall attractiveness.
Fortunately, you don’t have to be a graphic designer to get a great logo. There are number of services you can use, for example, Logomak.
Choose your typography
A general guideline is to limit the use of different typefaces in a website layout to no more than two.
During the exploration phase of a project, experimenting with various typefaces and colors is essential. While I typically advise sticking to no more than two different typefaces on a website, the decision ultimately depends on the nature of the site. In general, opt for a font that ensures easy readability for longer passages of text, while allowing for more creativity and variation with headings and calls to action. Don’t shy away from using larger fonts, and strive to be both creative and consistent in your use of typography.
Select your colour theme
Use a limited set of colours and tones to guard against visual overload
Throughout the process of choosing a set of typefaces, you should start exploring what colours you will use in the UI, backgrounds, and text. I recommend using a limited set of colours and tones for the general user interface.
It’s important to apply those consistently across the UI depending on the element’s functionality. Consider the layout of websites such as Facebook, Twitter, Quora, and Vimeo. Apart from adhering to the user interface (UI) guidelines, there typically aren’t strict color restrictions for illustrations or graphic details, as long as they don’t impede the functionality of the components.
Install Google Analytics
Google Analytics will allow you to see how many people are visiting your site, how long they’re staying on your site, what pages are getting the most views, and a plethora of other statistics. It also allows you to see which pages are performing the best and getting the most traffic.
These statistics enable you to comprehend what content resonates most with your visitors and where they are allocating the majority of their time.
If you’re serious about building a great site, you’ll want to install Google Analytics right away.
Go Mobile
Every website must have a mobile version. That is a fact. Mobile web usage statistics indicate that internet users now spend more time browsing the internet on mobile devices than they do on traditional computers.Google even announced recently that their algorithm will be prioritizing mobile-friendly websites on search results. The conclusion is clear: there’s no room in the future for websites that do not add a mobile version.
When you customize your site for mobile, pay close attention to readability, navigation and image sizing.
Keep Visitors Engaged
Once your website goes live, you’ll notice that the primary challenge shifts to attracting and retaining visitors. You can prepare for this task by adding features that actively reach out to visitors and keep your online content dynamic.
- Newsletter: Wix ShoutOut is a terrific newsletter tool that allows you direct contact with your subscribers.
- Social feed: Active on social media? Make sure your site visitors are aware of it and encourage them to connect on other platforms. The Wix App Market offers several apps that link your site with your social accounts or even display your social activities directly on your site.
If you’ve followed the steps outlined in this guide, you should now have a fully functional WordPress website! That wasn’t so bad, was it?
Last but not least, keep improving your website.